April 16, 2017

Happy Easter! Creativity in The Madden Household

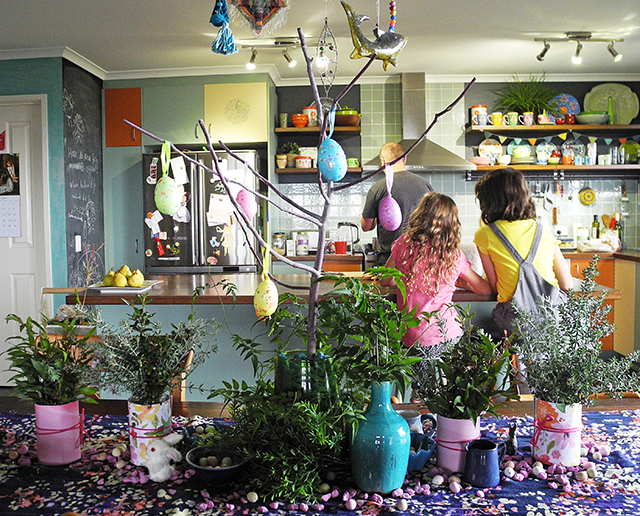
This Easter we decided to get all creative with a craft project that saw us painting wooden eggs, baking bunny cookies and making an Easter themed table centrepiece. 


Here are our gluten, dairy, grain & refined sugar free (but delicious) bunny cookies. Our bunny cookie cutter was from the gorgeous toy shop Epoche, and we used this recipe to make the bunnies.


I didn't spend more than $10 putting this centrepiece together. The table "runner" is actually a scarf. The greenery is from the garden in jars with scrap book paper and tied around with pink string.


I asked Miss S for a few bunnies from her collection, and used some decorative ceramic pieces and other bits and pieces from my collection.


There are some little pink decorative pebbles that I already had in my craft supply stash. And the pom pom seemed to ask to be put in the mix :)


The decorative hanging eggs were from the dollar store. I love mixing in cheap things, with nicer pieces.


Happy family memories in the making...


Here is the Easter craft component: wooden eggs that we painted. We bought the plain wooden eggs from Winterwood Toys (which is a felt & craft supply store). They took us 3-4 painting sessions to complete. When we'd finished painting them we added some glue and glitter. We love using glitter in our craft projects!


The painted eggs looked right at home when they joined our table centrepiece.


Then, because I had used some candy covered chocolate eggs in the display, it was just a little too tempting for the kids! (I didn't tell them, as I was hoping they wouldn't realise. These kids can sniff out sugar a mile away!)


Lots of bunnies to play with...


Which egg to eat? So hard to choose!


In the afternoon the sun started streaming through the windows & the table display putting beautiful light through the decorations so I just had to take some more photos. Can you spot the tiny opportunistic spider on it's web!? Our display is living!


So that wraps up our creative Easter.

I hope you have a lovely, creative & safe Easter with friends & family.

Jules :)

Thanks to Arhaus for suggesting I come up with a creative table setting. I loved the idea so I did it!

April 14, 2017

Getting Inspired by Kids Films

Kids art. Love it!

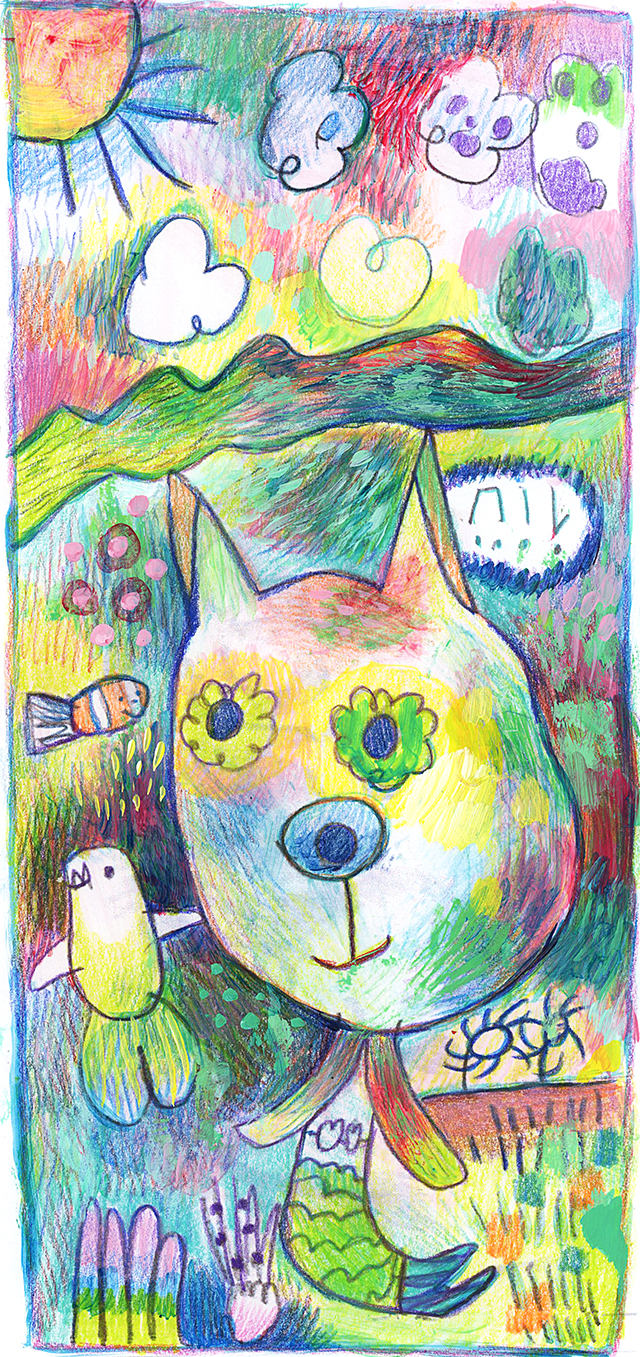
Miss I was watching Moana for about the zillionth time, and she was drawing as she watched it.

I loved her pencil drawing so much, I scanned it into my computer, enlarged it and printed it out. I coloured it in directly onto the printout, with my prismacolor pencils, then used acrylic paints & medium to give it some more colour.

painting, drawing, colorful art, colourful art

The creature in the middle is a cat mermaid. The little lines down the right hand side bottom are apparently shrimp. 

I think the clouds in the top right are drawn from the lava creature that is at the end of the movie. There are a few spooky parts in the movie for young kids; but overall we are totally in love with this film. Have you seen it yet? 

I love the crab, the character design of him, the way he talks, all the sparkly collected things he has on his back. My girls crack up when he says that he ate his own Grandma, and it took a week because she was absolutely humungous! Kids movies are so fantastic these days. I think they put lots of adult humour in there for keeping the parents entertained too. 


The realm of the monsters was my favourite part due to the colour and seaweedy shapes covering underwater structures. They look like quirky sculptures. The crab I love lives down there in the realm of the monsters. Moana is definitely a creative film. (I tried to find a brighter picture of the realm, but this is all I found. Still very beautiful.)

I just love how this story is about a strong female figure with a leadership role in her community, and she doesn't even fall in love! Love is great n all, but most female characters in disney movies end up swooning over some guy, right!? So refreshing.

I'll leave you today with a quote. So simple & beautiful.


Have a great weekend!

Jules :)


April 11, 2017

Upcycled Rug Hooking Project + Free Rug Hooking Pattern

Yay for finished projects!


I am notorious for starting craft projects and not finishing them. So I feel a little proud when I actually do finish something!

I discovered and fell in love with the craft known as rug hooking not too long ago, and decided to trial my own project.

I love colour and texture, and this craft combines those two loves. Not only do you get beautiful nuances of colour (especially when you use mottled or patterned fabric), but the texture of the little bumps of fabric is something I fell in love with when I first discovered this craft.


I made this project to be a wall hanging. I sewed a thin piece of dowel to the back near the top. I placed it a little bit down so I could hide the wall hook when hanging. The stiffness of the hooked rug means that the top of the rug stays up and doesn't sag.


I didn't have the correct tools or supplies, but I tend to make things up as I go, and overcome problems one at a time. I think any project is doable; you just need to break it all up into baby steps.

I used second hand scrap fabrics. I found my favourite fabric to use for this project was jersey fabric; the stuff t-shirts and leggings are usually made of. It's forgiving, it cuts up well, and it doesn't fray. It's made from our old clothes. They live on! Traditionally, wool is used for rug hooking projects, but you can really use whatever fabrics you like. Have a play and see what your favourite is. I found some fabrics really hard to pull through the hessian.

I have made a free rug hooking pattern for this project, so if you like it, you can make one of your own! Read on for the instructions.

-----------------------------------

I used some ordinary hessian from the fabric store; but if you can find some loose weave hessian I think that would be a lot easier to work with.

I used a crochet hook, but there are special rug hooks available that are dedicated for the task. Some people use latch hooks but for this small scale I couldn't get the hang of using one.

I cut my strips of fabric in about 1cm (3/8") widths. Experiment before starting with the width of strip you'd like to use, and what you feel comfortable hooking through the hessian that you have. Larger holes in your hessian will mean you can use wider strips and fill the space faster. I do however like the detail the small strips give in this project.

You don't have to use the colours I have used either. Use what you have. I chose to do a pale background with darker motifs, but you could switch that and do a dark background with lighter motifs. Keep in mind contrast; if colours are two similar next to each other, the elements of the design may not stand out.

Each square represents 2". Finished project measures 16 x 14 1/2". 
Leave 2" of hessian all around the edge of project. 

Enlarge the pattern by drawing up 2" squares on a big sheet of paper and drawing the shapes in. You can then place your hessian onto your drawn pattern and hold up to a window and mark the shapes with a black felt tip pen. (You won't see any pen marks on the finished piece.) Draw in the edge lines too.

Leave two inches of hessian all around the edge of your project, and zig zag around them with a sewing machine to prevent fraying.

Decide on your colours and cut some strips. I just cut as I needed them.

Here's my basic instructions on how to rug hook.


You stick your hook into the hessian and pull up loops. You can wriggle your hook around a bit when it's in the hessian to make the hole bigger for extra ease when pulling fabric strip through. You want to pull your loops up to a similar height (1) . In this project mine poke up from the hessian about 1/4". You start and end a strip with the ends poking up the top, not left dangling underneath (2). The fabric underneath is laying flat against the hessian, not in loops (3). 


You want to kid of twist your hook in the direction of that first arrow so you are pulling slack from the working end of the fabric strip (1). If you just pull straight up you will be pulling from both sides and you may pull out or alter the height your previous stitch (2). Once you start hooking you will get the hang of this. If you make a loop too big you can just pull the working end a little so it matches the height of the previous stitches.

If you make any mistakes you can just pull them out.

What the hooked rug looks like underneath. 

You don't need to pull loops through every hole in the hessian, otherwise they will be too tightly placed together. You want them close enough so that the hessian is covered, but not packed too tightly. My stitches are approx 5 to an inch for this project. Again, it will depend on the thickness of your fabric, the width of your strips, and the size of the weave in your hessian.

I worked in patches or flowing lines. It reminds me of those drawings you did in school where you traced your hand and then continued to draw lines around and around until all the lines fill the page :)

I didn't use a frame or anything, but yours may turn out less wonky if you use something to hold it taught while you work. (I think there's charm in wonky work!)

Once the project is finished, fold under the edges and stitch in place with a needle and thread. Sew your dowel to the back and attach a hanger to the dowel.

I attached a hanging hook to the dowel


Done! Yay! Superstar!

If you have any trouble or questions please let me know and I can clarify steps or add in extra tips.


I hung it up in our upstairs living area, above an artwork by Miss S. 

I hope you enjoyed my rug hooking adventure.

Jules :)

April 06, 2017

Out & About: West Gippsland Open Studios Visit

Recently we went on an art studio hop!

Open studios West Gippsland runs some weekends where some local artists' studios are open to the public to come and see creative people in their spaces. We chose three to visit, although there were 18 open studios over that weekend.

First up we visited Helen Timbury's bright and inspiring studio. Helen is a printmaker who is in love with colour, just like me. I loved all the beautiful old furniture in her studio and left with total antique-look paper drawer and studio lighting envy! And oh so inspired, of course!


It's always fascinating to me to peer into artists creative spaces. To see how they organise and store items, and how they choose to decorate them.


You can see those paper drawers up the back there that I am envious of! And those studio lights made the whole place look like naturally bright daytime light, for a studio that apparently was quite dark before.


We watched as Helen inked up a wombat lino cut, and the kids got to turn the big wheel on the press.


Turn, turn, turn...

The finished print


I'm a big fan of Helen's vibrant work. Miss 6 said that Helen's studio made her feel like doing paper mache :)

Next up, we went onto Wendy Hitchin's (aka Beady Wendy's) studio space, where she makes glass beads and jewellery.

Some of her gorgeous handmade beads

Interesting explosion of colour with the necessary supplies


Wendy wears special goggles to make the beads, as the flame is quite bright. She heats up the glass and rolls it around a metal rod, turning and turning as she goes, to make the beads. The kids were quite happy to wear the glasses and see a bead being made.


I love seeing the processes of all crafty things being made, it's so interesting to watch. Her beads are so colourful, and the kids got inspired watching one being made. (I didn't get a shot of the bead, it went into a kiln after she made it; if you leave them out to cool down in the open air they will crack.)

Our last studio visit for that day was Russell Lilford. His studio was situated at the side of his house in a converted garage. 


Studios that have a couch as part of the set up get a big tick in my book; I think to sit and contemplate in a comfortable seat is a luxury in a creative space; and I say if you have the room, totally do it!

This was one of my favourites of Russell's artworks. I like the contrast between the small brushstrokes and the bigger blocks of colour


Candles, feathers, shells and vessels adorned some of the shelves

Russell is a printmaker too, and has a press in his space

There is something special about jars of paintbrushes and gatherings of art supplies

It's really great to get out and about to see some art in real life. You tend to give pieces more of your time and contemplation than if you saw them on a computer screen. Creativity is contagious too, and getting out to see some art gets the motivation and inspiration flowing. 

Jules :)

April 02, 2017

Creative Life Round Up

Thought I'd do another one of those rambling/ round up/ catch up posts as I've been working on lots of bits n pieces here, there and everywhere. (Which is very similar to how I live my while life really; short attention span, quickly going from one thing to the next, leaving large messes behind me as I go...!)

I made a new craft tutorial for making your own bendable Easter Bunny Ears, and is now up on Alisa Burke's blog

easter craft, bunny ears, cute craft

DIY
Miss S and her bunny ears- my kids usually get to keep my finished crafts from the tutorials I make!

One of my passions is creative interiors, and I'm always looking for ways to spruce up my home. (I keep thinking the prettier it is, perhaps it will hide the mess? No?) I had some beautiful flower linen fabric for ages that I meant to make into cushions. But because my Mum is such an ace sewer, I hand balled the job over her. How good are Mums that sew!?

My new cushions and also some extra vintage fabric cushions I found recently whilst op shopping.

I used to make and sell a lot of bags back in my 20's. Thought I'd get into making some more. This is one bag I made not too long ago. It's from a Made by Rae pattern. (All her sewing patterns are so ace.) So, I have designed a new front panel, which I am not showing here yet, but I did go fabric shopping and bought all those lovely fabrics below the bag photo which will become new bags very soon. Yummy! I love fabric shopping! (Thanks again in advance, Mum.)


Some of the selected fabrics...

A paint palette shot from this week in the studio.

I've been busy working on some paintings, adding hangers, and visiting the local framers for a group exhibition coming soon in a town near me in The Station Gallery.

Some of the 10 works I've chosen to exhibit

And the school holidays have officially started! I've been busy trying to get lots of work done so I can relax a bit with my kiddies over the break. Hoping to do lots of this kind of thing:


Because, downtime and reflection are just as important a part of the creative process, I think.

Hope you've been creatively busy too, I'll be back soon with more creativity...

Jules :)


LinkWithin

Related Posts Plugin for WordPress, Blogger...
01 09 10