April 29, 2017

DIY Craft Tutorial: Decorative Painted Branches - Planter Stakes

Hello! I have some decorative planter stakes/ painted branches for you today as a DIY craft tutorial.

planter stakes, garden art, home decor


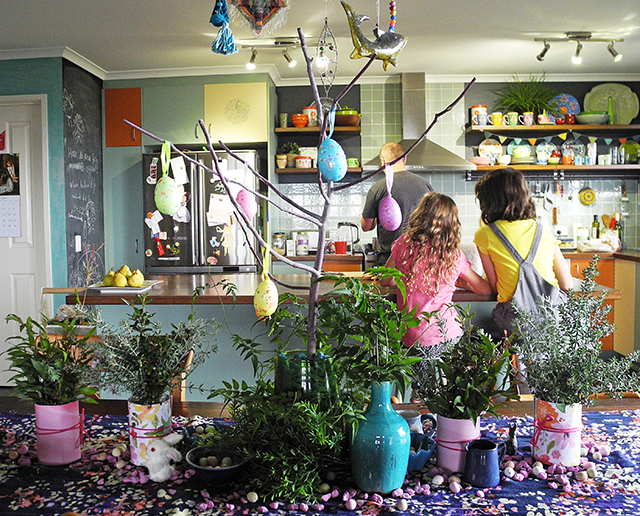
Every time I see some painted branches around on the internet, they catch my eye. I just love how you can take something as simple as a branch (they don’t cost much!) and create a pretty cool craft out of them. I wanted to join in on the fun and create my own, but with a bit of a twist. 


I decided I would do some painted branches but add some extra crafty bits to them. Up leveling, if you will :)


You will need:

- Some branches (ours were prunings from our own backyard. They are really nice and smooth.) My branches measure between 30 - 40cm (12" - 16").

- Acrylic paints

- Extra decorative bits such as wool, beads, ribbon, fabric, ric rac or whatever else you would like to use from your craft stash.

- Craft glue

What to do:

I started out painting the branches with acrylic paints. I used nice bright colours, painting bands of colour, some thin, and some wide. I added some spots here and there. Stripes also look good, in my opinion. 


I then took some wool and started winding it around a section of the branch, after placing a bit of craft glue underneath to hold it in place. I tied off the end and trimmed the excess, then repeated with various other colours in random places on the other branches. 


I wanted to add some pom poms to the ends of my branches, so I used a really quick method for making them. I’d like to say that that was because I’m just super nifty, but it’s actually because I live in a house with two young girls who love to craft as much as I do and my pom pom maker was not locatable! But this is a quick and easy method all the same!

You wrap the wool around two of your fingers. You need to leave a gap between your fingers to tie some wool around, so don’t do this first step too tight, or you wont be able to get the wool between your fingers. Tie a knot around the wool as in the photo, then slip off your fingers and trim through all of the loops. You’ll end up with a pretty scruffy looking ball; just give it a hair cut and it will be looking more like a pom pom in no time. 


I then glued my little pom poms to the ends of the branches with craft glue. 


I wrapped some beaded strands around by threading a beading needle onto some thread, and then tying the other end to a section of a branch. I then threaded on seed beads until I was happy with the length, and wound them around, with a bit of craft glue underneath for extra hold. I finished by sewing into the above beaded strand and then tying off the end.


Another fun idea is to sew in some little seed beads into some previously wound wool. I was pretty excited when I found these gold beads last time I went craft-supply shopping. I love them! 


I also tied some ribbon around in places with a knot. I liked the look of simply tying a knot and leaving bits of ribbon sticking out.

I also tied around some small pom pom ric rac (one of my all time favourite craft supplies), and glued some beads straight on.


And there you have it. Some bright decorative branches that you can use to decorate some plant pots, or you can put them into a holder or vase as “flowers” that will never die, if you’re anything like me and you leave the flowers a little too long before taking them out to the compost!


I hope you loved my painted branches tutorial. 

Jules :)


April 26, 2017

A Cool Kids Art Project: Paint A Graffiti Wall!


Wall mural, kids art, mural, painting, graffiti wall

This post contains affiliate links (see bottom of post for explanation).

A rainy day off school saw us painting on our graffiti art wall which we haven't worked on for a very long time. It's a really fun, exciting and creative art project to do with the kids!

I love our graffiti wall! One which I join in with them too.


We have a dedicated wall for this. It's on one wall in our hallway. I must say it's getting a little easier as the kids get older to work on it. It was a bit tricky in the past when they were younger trying to tell them, "no we don't paint or draw on any other walls... except this one!" A concept sometimes hard to grasp for little ones. (They're going to draw on the walls anyway, right!?)


I don't like to have rules during art time, but here are some of my guidelines ;)

- It's this wall & this wall only! 

- You may paint over old work if you want to. That's the whole point of the graffiti wall! But respect the new work that someone else is doing.

- For the parents: breathe, it's only paint!! You can always paint over it one day.

- Wear old clothes and an art smock. It can get messy.

This might not work so great in a carpeted area. This is an "at your own risk project"! Luckily we have vinyl wood flooring, so any spilled paint can be soaked and scrubbed away.


Hints for working on a graffiti wall:

- Use coloured pencils to make initial drawings. If you use water soluble ones, any mistakes can be wiped off worth a damp rag. 

- Use cost effective student grade acrylic paints.  When the kids were younger I used washable poster paint like these ones, because the paint had a tendency to spread through the house...

- Set everything up you need before starting: paints, palettes (one each), brushes, washing up water and rags.

- Make your art larger! This is quite tricky for my youngest to grasp, she still makes some little tiny drawings on the wall, but that's ok. I just let her go and do her own creative thing :)

- You need more paint squeezed out onto your palette for working in a larger area. 

- Try different sized brushes to see how it works. You may find you like a bigger brush than you thought you would. Again, student quality brushes are fine for this project.

- get involved and paint with your kids too.


Some ideas to try:

- Dripping paint

- Painting words

- Your fave animal

- Patterns & shapes: dots, spots, lines, flowers, stars, leaves

- Hand prints are super fun!

- Paint an image from a photo or book

- Paint yourself

It's also a chance to teach about some colour mixing. 

When we started out painting this graffiti art wall, it was during the day when my husband was at work. What a nice surprise he got when we got home! (I reminded him that he did marry an artist!)


I hope you enjoyed checking out our graffiti art wall. A super fun kids art project that is never ending. Update and repaint when the urge strikes.

Are you brave enough!?

Jules :)

*Affiliate Information: Affliliate links help me earn small commissions on products (at no extra cost to you), which helps support my love of blogging and sharing creative things. I only ever recommend or link to products that I'd use.


April 23, 2017

Some Sketch Book/ Art Journal Images

This post may contain affiliate links (see bottom of post for explanation).

I have been making more of an effort lately to do regular artwork in my sketch book. Thought I would show a few pages that I've been working on recently. You may have seen some of these already if you follow me on instagram or facebook.

These pages are still in progress

The above art journal pages are a work in progress. I used the book Botanicum as the inspiration. If I see photos or images that inspire me I use the colours and shapes as rough guides for my line work or style of painting. I don't directly copy, but I find elements within the image to inspire the direction I take. I may use some shapes, patterns or colours to influence my work.

Botanicum has really nice colour palettes and interesting shapes to explore

Processes I like to use when working in my art journal or sketch book are colour washes (using them like watercolours) with acrylic paints, using my prismacolor pencils, collage with decorative papers or previously painted paper or sketches (even failed prints can become material for collaging), thick paint overlaying thin washes, and also the use of different mediums mixed in with acrylic paint. Paint pens are also a new found love and are lots of fun.


I also like playing with hand drawn & painted type in my sketch books.


I can get as strange as I want in my sketch book. The beauty (I've said it before and I'll say it again) of the sketch book/ art journal is that there is no pressure. It doesn't matter if the work doesn't turn out how you want it too. You're creating this for no one and no one has to see it if you don't want them to!

A lot of spots and dashes and repetitive lines are making their way into my art lately

I love sketch books/ art journals as they are so portable. You can make up a bag of supplies and take them with you when you go out. I usually just take my coloured pencils and my sketch book; although I'm working out how to make my acrylic paints more portable! I'm thinking a small sealable jar (for water), a paint palette with a lid (possibly a small flat plastic container) and some extra smaller tubes of my favourite colours that can live in a devoted bag, a couple of brushes in a tin and a rag or tissue for drying them. I need to get organised! I really miss my acrylics when I take my sketch book out. 


My favourite all time sketch books are the Moleskine brand. Not because they seem to be the 'in thing'... but because of their paper quality, the way the pages lay out flat to create in, and the way the pages hold up to layers of paint without buckling too much. I love the smooth surface too, I don't really like paper texture when I'm creating, or paper that is too absorbent, but that is just my personal preference.

I hope you enjoyed my sketch book round up! I really do want to make more of an effort to be more regular with creating art in my art journals. 

Jules :)

*Affiliate Information: Affliliate links help me earn small commissions on products (at no extra cost to you), which helps support my love of blogging and sharing creative things. I only ever recommend or link to products that I'm genuinely into.

April 19, 2017

Home Decorating Books: Homespun style & Absolutely Beautiful Things

*This post contains affiliate links (see bottom of post for explanation).

I have recently come across two amazing home decorating books that celebrate the quirky, colourful & eclectic style.

Things that stand out for me with decorating books are lots + lots of beautiful photos. I don't think digital sites like Pinterest or e-books can ever replace holding a real book, but due to the fact that we have zillions of images online whenever we want them, books really have to stand out and be something special to warrant buying them. I think. And these two books fit the bill.

Home decorating book, home decor, eclectic style book, creative book

The first one is Homespun Style.

The first sentence in this book says "If you are crazy about colour, fascinated by craft and would rather paint a junk-store chair than buy a new one, then you will love homespun style." I've got my hand up!


The pictures in this book are gorgeous. I said to the husband-man whilst flicking through this book, "How 'me' is this book? Look at it... look!" He was like, "that's nice, dear." (Most husbands just don't get it, do they? Just like they don't understand cushions. But we know right? And if you're a guy reading this and you understand cushions, then please explain their awesomeness to my husband.)


This book is about styling unique, colourful, creative spaces within the home. It celebrates second hand flea market furniture, and the upcycled. There are beautiful, simple creative ideas for decorating your home, that don't require a tonne of skill. Think strips of fabric hanging from a pendant light, bunting hanging up, coloured painted upcycled frames, pretty dresses hanging on quirky op shop hangers & gorgeous wallpaper patches and patterned fabrics adorning every nook and cranny.

You can get crafty with lots of ideas for creating things for your home, but the book doesn't expect that you are crafty. You can always seek pieces out from other creative people. Ahem :)


Sometimes I pick up home decorating books and feel there are not enough pictures (as I mentioned before), but this isn't one of those books. It has the perfect balance of words and pictures. After all- books about home decorating are about creating visually pleasing spaces; so you need lots of juicy photos! And all those pics satisfy the colour loving maximalist in me.

I love that creative spaces such as sewing areas have been included in the book

It's just yum! I love this book!

Another book I have discovered is Anna Spiro's Absolutely Beautiful Things.

Home decorating, home decor, eclectic, colorful, colourful, creative

The author Anna Spiro stole my heart when she mentioned at the start of the book that she loves mismatched clashing items, and that she's a maximalist that loves layering and colour, mixing the old and the new, the expensive and the cheap. Seriously, could she be any more seducing!? :)

She shares her design tips, and her process of creating decorated spaces.


The photos are luscious and colourful and just beautiful and totally my style.

There's lots of inspiration for decorating your home in this eclectic colourful style if that's your thing, in both of these books.


Absolutely Beautiful Things

I love these two home decorating books because they celebrate individuality, creativity, and colour. They both promote the idea of using your intuition for decorating your home, not some rule book. I think if you collect items that you really love, you are not going to go wrong.

Anna Spiro also mentions that there is no rule book (yes!), and if there was she'd break all the rules anyway (double yes!)  I love that.

You just have to have fun with it.


So all the digital images in the world will never replace holding a real book and feeling the pages for me. I seem to slow down when I hold a book, and take the time to drink it in. Along with my tea :)

After reading these two books I'm definitely inspired and feeling the urge to buzz around the house rearranging spaces. I always go in cycles; sometimes I'm in a painting cycle.. sometimes a home decorating cycle.. gardening (although I'm struggling to find the time for gardening lately). I am in a home decorating phase at the moment, so I've come across these two gorgeous books at just the right time.

Do you love the creative, eclectic, colourful handmade decorating look too, or is this a bit out there for you? I often have people who come in to my house and say they wish they could be as bold in their own homes. I say, if you want to decorate your home with an eclectic, quirky & colourful style, just do it!

You can find these two books here: Homespun Style & Absolutely Beautiful Things.

Jules :)

*Affiliate Information: Affliliate links help me earn small commissions on products (at no extra cost to you), which helps support my love of blogging and sharing creative things. I only ever recommend or link to products that I'm genuinely into.

April 16, 2017

Happy Easter! Creativity in The Madden Household

This Easter we decided to get all creative with a craft project that saw us painting wooden eggs, baking bunny cookies and making an Easter themed table centrepiece. 


Here are our gluten, dairy, grain & refined sugar free (but delicious) bunny cookies. Our bunny cookie cutter was from the gorgeous toy shop Epoche, and we used this recipe to make the bunnies.


I didn't spend more than $10 putting this centrepiece together. The table "runner" is actually a scarf. The greenery is from the garden in jars with scrap book paper and tied around with pink string.


I asked Miss S for a few bunnies from her collection, and used some decorative ceramic pieces and other bits and pieces from my collection.


There are some little pink decorative pebbles that I already had in my craft supply stash. And the pom pom seemed to ask to be put in the mix :)


The decorative hanging eggs were from the dollar store. I love mixing in cheap things, with nicer pieces.


Happy family memories in the making...


Here is the Easter craft component: wooden eggs that we painted. We bought the plain wooden eggs from Winterwood Toys (which is a felt & craft supply store). They took us 3-4 painting sessions to complete. When we'd finished painting them we added some glue and glitter. We love using glitter in our craft projects!


The painted eggs looked right at home when they joined our table centrepiece.


Then, because I had used some candy covered chocolate eggs in the display, it was just a little too tempting for the kids! (I didn't tell them, as I was hoping they wouldn't realise. These kids can sniff out sugar a mile away!)


Lots of bunnies to play with...


Which egg to eat? So hard to choose!


In the afternoon the sun started streaming through the windows & the table display putting beautiful light through the decorations so I just had to take some more photos. Can you spot the tiny opportunistic spider on it's web!? Our display is living!


So that wraps up our creative Easter.

I hope you have a lovely, creative & safe Easter with friends & family.

Jules :)

Thanks to Arhaus for suggesting I come up with a creative table setting. I loved the idea so I did it!

LinkWithin

Related Posts Plugin for WordPress, Blogger...
01 09 10