Showing posts with label Mosaic. Show all posts

April 15, 2020

Concrete Mosaic Hearts

Garden decorations! I love them, especially the projects that you can craft yourself. I love the satisfaction of walking around the garden and looking at the things you've grown and made for it.

I've used silicone baking moulds to make these concrete hearts. I've made plain concrete hearts before and then glued mosaic tiles onto them later on- that method is called the direct mosaic method- but here I'm using the indirect mosaic method.


The indirect method involves placing the tiles face-down into the moulds. I've pre cut some clear contact here to fit the heart shape moulds, and placed it sticky-side-up into the moulds. The tiles then have something to stick to to keep them in place for when you put concrete in.

You could also use paper and stick the tiles down using a glue stick if you wish.

It makes it tricky to see what colours you're using when you do the indirect method- but for this project it doesn't matter too much as the tiles are just placed randomly, and the end product gives a nice flat surface.


Now mix up some concrete. You could either use plain cement and sand and mix according to packet instructions, or just use some mortar mix which is premixed cement and sand. Place the moulds onto a board & use a spatula to fill the moulds with the concrete mix. 

Always make sure to add as little water as you can to your mix- that will make it stronger. I sometimes add a fortifier to my concrete mixes to make the mix even stronger again.


Jiggle and tap the board to help release any air bubbles to the surface. I like to then let the hearts set for around 1/2 an hour then cover them in plastic for a few days to keep them wet, so they can cure and harden. Keeping them moist whilst curing can also help your finished product be stronger.


Remove from plastic and pop out of moulds and let dry. 

Mine had a few air bubble holes in them which I filled with a pale grout, or you could make up a little more concrete mix and use that to patch up any holes.

This is a fun project that is easy enough for kids to do too. Mine certainly liked finding spots for them to go in the garden.


Jules :)

July 23, 2019

DIY Pistachio Shell Mosaic Craft

I have an easy DIY craft project for you today using something that would normally be thrown away.


How can one be creative, and eat pistachio nuts and not hoard those cute little shells for a mosaic craft project!? (Unless you don't eat nuts that is...)

You will need:

-Plywood or masonite panel in your choice of size
-Tile adhesive (I used a premixed indoor adhesive)
-Pistachio shells
-Acrylic paint
-Acrylic gloss sealer/varnish

Start by spreading your adhesive over your wooden panel. I love this part, it's so like icing a cake :)

Press the shells into the adhesive. You can go totally random or do flower or spiral shapes if you like. Let dry fully.


Once dry you can start painting the shells in colours of your choice using acrylic paints.


Add any interesting paint effects like spots, stripes or variations of colour. Keep these colours bright so they will contrast with the darker colour we will add later. (They kind of remind me of easter eggs!)


Once you've painted all of your shells, coat in acrylic gloss and let dry overnight. (You want the gloss to be fully cured as we will be wiping it back and we don't want it to shift.)


For my pretend "grout" colour, I made a runny mix of deep purple paint, and painted it over the surface and then wiped the shells back with a just-damp cloth. Rinse your cloth out when it gets too dirty.


Use the deep purple paint to do any touch ups to your "grout" with a fine brush.


I made a little wooden frame for my pistachio shell mosaic craft, but you can display as is if you want!


I hope you enjoyed this DIY craft!

Jules :)


March 30, 2018

Crazy Mosaic Lamps!

I have a thing for weird lighting; perhaps one day I'll do a round up and show all the lights I've made or upgraded in one post! But first I'll have to finish the big white blank one I have in the downstairs living room.

This post contains affiliate links (see bottom of post for explanation).

I started out with some lamps that I bought from an op shop. I've been holding onto one for years with all intentions of mosaicing it, and so before I decided to get started I went and bought more so I could mosaic a bunch of them at once. 


I mosaiced them using Weldbond, which is an all purpose glue that can be used for ceramics and glass. I had to prop the lamp at the right angle so that the tiles would not slide off, and mosaic in sections at a time. I'd mosaic a small section, wander off and go do some other jobs, then return and turn the lamp base and mosaic some more. The beauty of working on more than one at a time meant I could work on another whilst one was setting.


I applied white grout after the mosaicing was complete, and then once dry, painted it with watered down acrylic paints.

Miss 9 suggested I paint the grout in rainbow colours. Good idea, Miss 9!

The shades were covered in squares of fabric using Mod Podge. I painted the Mod Podge on first, then placed the fabric on and painted the Mod Podge over the top. I used a bit of water to dilute it slightly. I then added pom-pom trim, and other fancy trim to the top of the shades using clear craft glue. 


When working with mosaic, I think circles and flower shapes look effective, as well as wavy lines and blocks of colour. I also think mixing up materials works well too, like tesserae tiles with ceramic, plus fancy glass pebbles, and pretty ceramic shapes. You can see some little stars and petal shapes I've incorporated into the bases. You don't always have to use tiles specifically for mosaic, you can look at garden pebbles, and I've even used some decorative fish tank stones as well.


I just love how they turned out! I love all the craziness and colour!


I think they'd look good en masse on top of a set of drawers, because why stop with one crazy lamp!?

Jules :)

*Affiliate Information: Affiliate links help me earn small commissions on products (at no extra cost to you), which helps support my love of blogging and sharing creative things. I only ever recommend or link to products that I'm genuinely into or would use.


July 18, 2017

Garden Art: Decorating Plant Pots

This blog post is about a creative garden art project I did with the kids. Decorating plant pots.

Or as we called it whilst we were doing it: cheats mosaic!

We've worked on a few crafty projects these just-gone school holidays. Not as many as I would have liked, but then again do we ever do all the things we put on our to- do lists!?


Decorating, or "mosaicking" these plant pots was a fun activity to do with the kids; it felt like a craft project, but involved no glue or paint, and was easy, and the kids had a ball!

We called it "cheats mosaic" as we were "mosaicking" the surface of the plant pots, but just arranging our decorative tiles, glass pebbles and beads on top of the potting mix. The decorations act as a mulch too, so this is a bonus :)

This would be a fun project to do with young kids, as it's so easy and the little ones would be quite pleased with their results.

We gathered our supplies which included mosaic tiles, coloured garden pebbles & rocks, glass pebbles and some beads. Buttons would also work! I get my supplies from all over but try specialised mosaic suppliers, hardware stores or tile shops for tiles, garden shops for decorative pebbles & rocks, and $2 stores, and crafty stores for various other bits n bobs.

The mosaic supplies are so fun to play with & organise

Once we had all our supplies all set out, we simply went to work "mosaicking" our pots. 


Miss 8 went for a spiral design, whereas Miss 6 went for a hodge podge! I thought she was going really well and should've stopped earlier, but adding more and more beads was just too fun and tempting. I did not impose my design opinions on her though; I let her be free with her creativity!


We now have some cute pots to place around the house. I'm sure they will get tampered with, but that's ok. I loved that the girls had a great time with it and it was more about the experience and process of creating. I might run out of a certain tile whilst mosaicking in the future, and have to  borrow some of these... shhhhh :)

Who loves pretty, shiny things!?


So, who says you need to use neutral mulches for your pots!? 

If you're into colour in your life this is a creative idea for adding some colour into your house in your indoor pots. Or outside pots. 

I love garden art.

I could totally see this used as a project for kinder kids making a gift for Mother's Day, using a small potted succulent with all the decorations that the kids could place in. Fun.

Jules :)

February 14, 2017

Mosaicing With Kids: A How To with Tips & Safety

This post is all about making mosaics with kids, my 'how- to', tips & safety.
mosaicing with kids, kids craft, craft, tutorial, craft tutorial, DIY
I find mosaic a wonderful craft to do with kids as there's not a lot of skill needed to make a finished product that kids can be proud of, so once you have everything you need you can just jump in and get started. They're also using more specialised materials, things like tiles and grout, which adults use for proper adult jobs, so it can make them feel very clever indeed!
mosaic, art, garden art, art garden
For basic mosaic you don't need a lot of fancy equipment or supplies, and most can be found at the local hardware store. We buy a lot of our tiles online here in Australia from The Mosaic Store, but hardware stores sometimes have craft sections with tiles, then there's other craft stores, $2 shops, and actual tile shops that usually sell the lovely glass tesserae.
Craft supplies, mosaic supplies
Some beautiful millefiori stars from The Mosaic Store
glass pebbles from the garden section of our local hardware store


The tesserae is probably the easiest to start with as it's easy to cut with a pair of tile nippers; and smaller decorative tiles that don't need to be cut.

Supplies needed:

- Various tiles
- Terracotta plant base
- Outdoor PVA glue
- Outdoor tile adhesive
- Outdoor grout in your choice of colour

Tools & other items:

- Tile nippers
- Homemade plastic scrapers cut from empty containers
- Rags
- Soft scrubbing brush
- Latex gloves (grown up size and kid size)
- Eye protection (for when you're nipping tiles)
- Paintbrush for brushing on PVA
Mosaic Tools, mosaic tiles
Tile nippers, glass tesserae, other smaller mosaic tiles, plastic scrapers

Safety tip: Make sure kids are wearing shoes as little shards of tile can be sharp!

Starting out with something like a terracotta plant base is fantastic. The surface is flat so you won't have tiles trying to glue against gravity, and the edge provides a physical border to keep their tiles within a neat shape.

We coat our terracotta pieces first with outdoor PVA wood glue and leave to dry.

Then, we use an outdoor tile adhesive. The one I have is cement based. As long as you get an outdoor tile adhesive you should be fine. I like to mix this away from kids as I don't want them breathing in any cement dust. I just use an old plastic container and the wrong end of a flat paint brush to mix. Once the adhesive is mixed it's not an inhalation risk anymore. Spread a layer of adhesive down for them around 2-3mm thick (1/16").
colorful, colourful, craft, kids craft, kids creating, mosaic tiles, mosaic craft
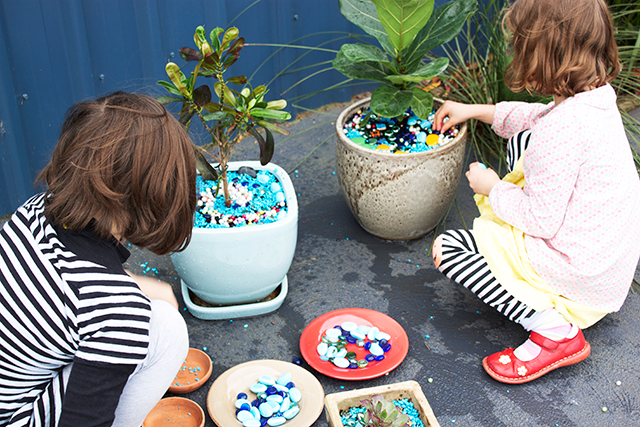
We keep our tiles organised by colour

I nip tesserae into smaller pieces, and then they just use some of the smaller shaped tiles as they are. You nip by placing the nips at the edge of a tile while holding the tile with your other hand. Press down and it will break into two. Some tiles break nice and evenly, others may not. Practise with a few. Wear your eye protection and do this away from kids so that little bits of broken tile don't fly towards them.
They can then glue their tiles onto their terracotta base. I have found some kid sized latex gloves in our local supermarket which have been perfect for protecting little hands from the adhesive. Try and get them not to butt tiles hard against one another so remind them to leave a little gap. I always explain to kids that making mosaics is kind of like doing a puzzle; you just find where a piece seems to fit and place it in. Another thing is we don't stack tiles on top of each other. This may seem obvious but to a kids fresh mind, it's not! I love their boundless ideas. Try also to get them to not leave big open spaces. Again, I'm not too concerned, but for the longevity of the piece, it's best not to leave big gaps between tiles.

So:
- leave a little gap
- don't butt tiles hard against one another,
- place tiles side by side, not on top of each other.
Kids also sometimes get the right and wrong side of the tesserae mixed up. The bumpy side is the wrong side, the smooth side is the right side. Have a chat to them first and explain and show them this. You may have to keep reminding them! Some will still keep mixing them up, but it doesn't matter too much.
Smooth side is the right side!
When they are happy with their arrangement it's time to leave it to dry for as long as the adhesive's instructions.

*Sometimes kids get a bit messy with the adhesive. It helps to go back when the adhesive is dry but not rock-hard and scrape a bit of the excess adhesive off the top of some tiles and between them if there's too much.
Scraping some excess adhesive away with a piece of tile (a nail could also work)

Then, we grout! Again, I mix it up to the consistency of thick cream away from kids so they don't breathe the dust. Then we use little homemade plastic scrapers (cut from plastic containers) to spread the grout on. This part is messy and therefore fun!

Plop it on and scrape it all around to make sure you fill all the gaps between the tiles. Wear gloves for this bit.

Once it's done and it looks like it's starting to dry off a bit you can take a soft scrubbing brush and start to scrape the excess grout off the front of the tiles. (We also have a stiff paintbrush here that did the job on a previous project too.)

Then use a dry cloth to polish. If there's any staining on the sides of the dish that you don't want, wipe that away with a wet cloth.
And then you're done! Let it dry before you put into the great outdoors.

It's so satisfying creating something that will last and pretties up the garden.
Proud creators
In situ :)

And once you've mastered the basic skills you could progress onto other items such as plant pots or picture frames.
Miss S with her mosaic plant pot

I hope you enjoyed the mosaic how-to & tips from me. If you have any questions please leave them in the comments and I will get back to you, and be sure to let me know if you try mosaicing with kids!

Jules :)

LinkWithin

Related Posts Plugin for WordPress, Blogger...
01 09 10