
Hi creatives!
A DIY Home Decor craft project today, chevron pattern stamped curtains, that has literally taken me forever to get up here on the blog!


I had some old random curtains that I thought needed a bit of work. I sewed two different curtain sets I had here together because the window I have is large.
To make these stamped curtains you will need:
- plain curtains
- piece of wood plank off cut for the stamp back (mine measures 14 x 33cm or 5.5 x 13")
- craft foam
- white block printing ink
- fabric paint additive (optional)
- block printing brayer (roller)
- piece of glass
- craft glue
- scrap fabric, scrap paper, spatula to scoop paint, rags for clean up, glue stick & sticky tape
You'll need a large flat surface to print on- the floor is good or a table but make sure it's protected with drop sheets. My floorboards are textured so we found a long, wide piece of laminate wood in the garage that I put under the section I was printing on.
You may want to add a craft fabric paint additive to your paint, which will turn your creation washable. You will need to heat set this with an iron according to manufacturers instructions. I didn't do this as I didn't have enough left and was too lazy to go buy some and even lazier when it comes to washing curtains, so these will probably last me a long time! ;)
I started by doing a quick drawing of the pattern I wanted, and then cut out strips of craft foam to glue to my wooden block. I drew a line down the middle of the wood so I could make sure my foam pieces were centred, and I used a little paper template to make sure all the angles were the same, and glued them down with craft glue. (My foam pieces measured approx 85 x 8mm or 3 3/8 x 5/16")
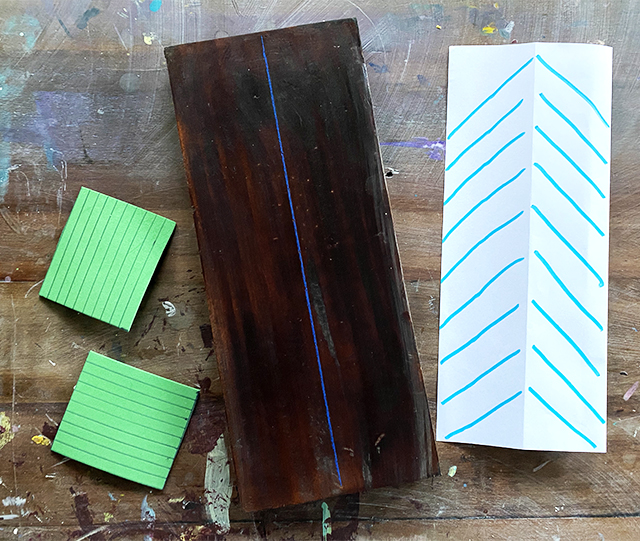
*After testing the print, I added a second layer of foam strips to the first one to be more spongey, it enabled me to get a better more uniform print than just one later of foam.*

Once I had my stamp made (and let dry overnight), I made a test by stamping on paper, but before lifting trace around the stamp and cut the print out. It was then glued to the top of the wood (just with a glue stick) so that when I used the stamp I could see exactly where the print was going to be. I covered it with tape for extra protection, as the stamp needed to be washed out after each use and I did this project in multiple stages.

Using block printing ink (add your fabric additive here if using) and a brayer roll out an even layer of ink, then use the brayer to roll the ink on your stamp. Do some test printing on scrap fabric until you work out the amount of ink you need and pressure to get a good print. I literally stood on the back of my stamp every time I printed, as that gave me a stronger print.

Make sure your surface is protected with drop sheets, and that also your work surface is smooth. I used a long piece of laminate wood that I had in the garage as my floor is textured and my table tops are all wonky (natural wood!).
Use some scrap paper to cover places like the curtain tabs at the top, that you do not want printed, then you can get your pattern all the way to the top. (Not like in this below photo! I fixed that up later on!)

I went all the way down one side of one curtain with the pattern, then I started the next line by placing the stamp down and then measuring with measuring tape where the edge of the stamp was, then marked with masking tape all the way down the length of the curtain so that my pattern didn't go off track. I did this for each new line of stamping.

I then continued on in stages, letting some dry so I could fold the curtain up and stand on the dry parts, and then continued. My curtains were quite wide so it may not be as big a job for you as it was for me!

Done! DIY home decor in the form of stamped chevron patterned curtains. I hope you liked this tutorial!

Jules :)

No comments:
Post a Comment