Showing posts with label Sculpture. Show all posts

December 09, 2019

DIY Craft: Rhubarb Concrete Stepping Stones

Hello!

I have a DIY concrete craft for you today: rhubarb concrete stepping stones.


I have by no means come up with this project. I've just seen it done so many times and wanted to make some for our backyard and I'm sharing our experience.

It's sumer here! I am so happy the weather is warming up which means we're heading outdoors much more as a family on our one acre block. There are always jobs to do (so many weeds- ugh!) and big projects to work on that Jimmy has started. We are currently working on some crazy paving using slate in a new fire pit area. We have an electric cement mixer here (which I dubbed Jimmy's thermomix) and I decided to steal some of the mix so the kids could be outside alongside us working making stepping stones.

We laid out some plastic sheeting on an outdoor table and the girls picked some large rhubarb leaves from the garden. (See Jimmy, rhubarb IS useful for more than just apple and rhubarb pie :D)

The leaves have lots of cool veiny texture which captures really well in the concrete.


We had some pretty tough wire that we used for reinforcing (which you can see in the bottom left hand corner above), which Jimmy cut with a grinder. You will need some sort of wire to reinforce the stepping stones, if you need to cut by hand just use the thickest wire you can manage to cut by hand.

The girls then took handfuls of the concrete mix and slapped them down onto the leaf. You keep adding them till you reach near the edges. I get them to wear kids gloves as you don't want skin to come into contact with concrete. 

(For a nice strong concrete mix I like to use 1 part grey cement, 2 parts fine sand, and 1 one part coarse sand and a cement additive (optional) to packet instructions. You can also find suggested mixes on the sides of a bag of portland cement.)


We kept in from the edge of the leaf an inch or so, and shaped our leaves into heart shapes. Once we had one layer of concrete on the leaf, we placed our wire reinforcing in, then added another layer of concrete. Our stepping stones were around 1 1/2- 2" thick. 


The girls tended to make their edges a little thin so I needed to remind them to build them up to make them the same thickness as the centre of the stepping stone.


Once shaped, we let set for 1/2- 1 hour then came back and covered with plastic. I kept them damp and covered for one week to let them cure for extra strength. (A minimum of 3 days would be sufficient.) 


24 hours after they've been made you can peel the leaf off and neaten up any rough edges with a chisel or rasp. 


The kids had fun peeling pieces of leaves back! :) They were really stuck in there, but they come out easily when they're all dry.


I love how they turned out and want to make lots for all around the garden! Jimmy thinks the rhubarb has earned it's keep (he thinks it pointless keeping something that requires a tonne of sugar to do anything with.)


I hope you enjoyed our DIY craft rhubarb concrete stepping stones experience, please drop a comment if there's anything you'd like me to craft out of concrete. It's such a versatile product, and it lasts a long time as art in the garden. Affordable, and no kiln needed! 

Enjoy,

Jules :)

June 20, 2018

New Art: Sculpture

Hello Creativity Lovers! I have some new art to share today in the form of a sculpture.

I was driven to create a piece that was elaborate and detailed. As I was making it I was thinking about the woman holding the cheetah creature, who also seems to represent a child, with its naive face and it got me thinking about the things we are connected to. We care for the extensions of ourselves in our lives; children or animals, and we are bound and tied to them in bittersweet ways. 

The Ties That Bind Us or; Nurture

The binding is represented by the entwining black beads around the woman's leg, keeping her in a place that sometimes feels restrictive, but ultimately, it's where she wants to be.

It's a mixed media art piece that was made used paper mache, air dry clay, plaster, gauze, wire, beads, wool, fabric and acrylic paint. It's also a shout out to my love of crazy colour, texture, and maximalism.


I think this 3D art/ sculpture has got me all excited about a new way of working, and my mind is flooded with imagery of possibilities. I have signed up for a ceramics class next term to keep this 3D art & sculpture thread going, and am excited to see where that leads.

Hope you enjoyed checking out my latest project.

Jules :)

May 08, 2018

Plaster Wall Hangings

Hello Creatives!

I've just had a mini Etsy shop update, where I have finished uploading some of the plaster art wall hangings I've recently made. I now have birds and hearts in the shop.


They are made from plaster (so suitable for indoors only) made from a silicone mould that I made myself. I cast them in plaster, then clean them up when set, and paint them in acrylic paints.


They are coated with a gloss acrylic sealer. Each one is one-of-a-kind and totally unique.


You can find them in my shop here!

Jules :)


February 04, 2018

Out & About: Sand Sculpting Frankston 2017

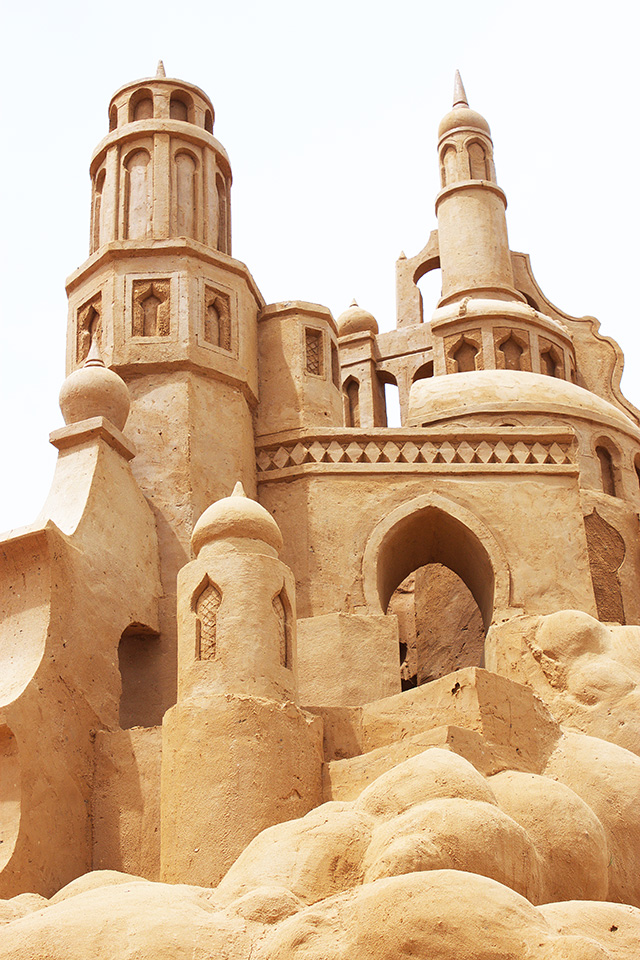
A few weeks ago we made our way out to see the latest Sand Sculpting Australia's event at Frankston, Victoria, this year's theme being Aladdin.


3500 tonnes of sand was sculpted into characters and scenes with mind-blowing detail. The work that's gone into each sculpture is amazing. I was interested to learn that there are no additives added to the sand, they use brickies sand which holds it's shape, and they start with big blocks which the sculptors carve into. It took 20 sculptors 5000 hours over 30 days to create them. They are then sprayed with a bio-degradable finish to help them last.


Some of the sculptures were a tiny bit weather damaged, but that did not impact the exhibition at all. In fact, I'm amazed that they stand up to the weather for so long.


We all had favourites. This bird was one of mine. I think it's the combination of textures and the organic shapes and chunkiness of it that I liked.


The centerpiece was this huge castle. It was huge and pretty fantastic. I think I took a few too many photos of it :)


This event certainly inspires the kids to get into a bit of sand castle building afterwards! We actually had a trailer load of sand at home for some work that Jim is doing, and so the kids got in there later on and started carving out the sand :) it always makes me happy seeing them inspired.

After the sand castles we went for a bit of a paddle at the nearby beach. (Well, the kids did. Too cold for me!)


You can check out more information about the Aladin sand castles at Sand Sculpting Australia. The exhibition runs until 25th April 2018.

Jules :)


September 28, 2017

DIY Pet Memorial Stone

A craft DIY for you today in the form of pet memorial stones, if you have any furry friends to honour.


Just before our new pup came along I had a pang of guilt that I hadn’t yet made memorial stones for my two previous fur babies who have since passed on. So in their honour, I purchased a bag of mortar mix, dreamed up the project and completed the task. I couldn't find what I wanted them to look like online, so I came up with a project myself.

You will need:

-Mortar mix
-Cement additive/ fortifier (optional- but gives your finished piece extra strength)
-Chicken wire (use a small gauge- not the big size)
-Newspaper
-Masking Tape
-Acrylic paint in black and white
-Matte medium

Tools & other useful items:

Pliers, metal spatula, rubber gloves, various clay tools or skewer, stamps, paintbrush, rags, plastic bags.

To start with draw on a piece of paper how big you want your stone to be. Scrunch up some newspaper and wrap it in masking tape. Make the scrunched newspaper shape about two thirds the size you want your final stone, as adding wire and cement layers will add extra bulk.


Cut some lengths of chicken wire and start wrapping around your newspaper shape. Cover the shape with approximately 3 layers of chicken wire. Use pliers to twist ends together and inwards so there are no spikes sticking out.


Take your mortar mix and mix some up adding some cement fortifier as per instructions. I used Bondcrete. I guess how much cement I’m going to use, trying not to make too much as I can always make more. Make your mix on the drier side rather than making it too wet. You will get better detail when it comes to making the marks, and a stronger mix.

Working on a plastic work surface start pressing your cement mix into the chicken wire. You need to do this all over the stone shape, including underneath. 


Keep adding cement until all of the wire is covered. My stones ended up having a flat base, and I just smoothed the cement all around the bottom edge for a neat appearance. On the top of the stones you need a fairly thick layer of cement, so that you can stamp & draw some elements in without hitting the chicken wire underneath.

When this is all done make the whole stone nice and smooth using your gloved hand or a metal spatula. It’s quite fun- similar to icing a cake.


Use a clay tool to write words by pressing into the cement rather than ‘drawing’, and use stamps with bold shapes to press into the surface. Fine detailed stamps will not show up so well. I made some stamps out of polymer clay specifically for this project.


Once you are happy with your creation, leave to set under plastic. Wrap the plastic around the stone loosely, as you do not want the plastic to disturb the surface of the stone.

Once the cement has set (keep checking at half hour intervals. It might take 1-3 hours and it still should be wet), come back and wrap wet rags around the stone, then wrap in plastic and leave to cure for 3- 7 days. Curing cement slowly like this gives it extra strength.

Once the stone has had decent time to cure let it dry, and mix some black acrylic paint with equal parts matte medium and enough water to make a runny mix. Working quickly, paint the black paint mix into the stamped and written crevices, and wipe the excess away using a damp rag. As I used a cement fortifier, my cement wasn’t super porous, so this stopped a lot of paint seeping in where I didn’t want it too. If you didn’t use fortifier, wetting the stone first might help.


If you want extra depth and contrast to your stone, dry brush some white acrylic paint over the top to highlight. You do this by getting paint on your brush (not diluted) then brush most of it off on some paper so that when you paint your stone only minimal paint is being transferred. 


Place your stone in the garden and you can remember those furry friends every time you wander in the backyard.

Yes, we named our previous dogs after Futurama characters!


RIP you guys.. miss you xx

I’m also thinking this project would work well as gifts to grandparents with little handprints pressed in with names and dates, heart shapes and pebbles pressed in.
Have fun,

Jules :)

LinkWithin

Related Posts Plugin for WordPress, Blogger...
01 09 10